
Cloth Nappying 101
- ruralhealthstyle
- Jun 24, 2024
- 12 min read
If you're curious about cloth nappies, wondering how you can make them work for your family, concerned about affordability, or just plain don't understand how they work... this blog is for you!
Welcome to my how-to guide for all things cloth nappies; from purchasing, to washing; from understanding the lingo, to setting up a stash and wash routine that works for your family; as well as troubleshooting leaks, and hacks for newborns and night nappies; read on for all the tips from an almost 2 year cloth mum!
First up, I want to give a massive shout out to Clean Cloth Nappies! They have a website and a Facebook group, that were both incredible resources for me starting on my cloth journey. I will be referencing them throughout this blog, and I highly recommend checking out their content for clarity on all things cloth!
Part 1: The Lingo
Understanding common cloth terms and phrases:
- Modern Cloth Nappy (MCN): an umbrella term for a range of cloth nappies that typically consist of a plastic backed fabric with elastic seams as an outside spill proof layer, with absorbent layers inside.
- PUL shell (polyutherane laminate): the type of plastic backed fabric used to make MCN shells, the shells are a nappy shape with leg elastics and waist elastics, and adjustable snap buttons to get the perfect fit.
- Insert: the absorbent part of a modern cloth nappy, typically several layers of an absorbent fibre, sewn into a pad shape that fits inside most MCNs - common fibres include microfibre, cotton, and bamboo.
- OSFM (one size fits most): the most common size of MCN, with adjustable snaps that are designed to fit from ~5kgs to toilet training (you can also use a 'newborn hack' to fit them on a smaller baby and save buying a newborn size that your baby may only fit for a few weeks or months.)
- Pocket Nappy: a type of MCN that has a PUL outside, and a stay dry microfleece 'pocket' on the inside that allows you to slide the inserts inside so that they stay secure and don't move out of place when your baby is on the move.
- AIO (all in one): a type of MCN that has the usual PUL shell but the inserts are sewn into the inside of the nappy, making them an all in one piece instead of multiple pieces put together.
- Terry Square: a square of terry towelling fabric, easily purchased at department stores, like Big W, that can be used as a cloth nappy, burp cloth, or for cleaning up other kid related spills.
- Delamination: a process of deterioration where the plastic layer of PUL lifts off the fabric, compromising the water resistance of your nappy. (I have been working on some ways to overcome this and extend the life of delaminated nappies to keep them out of landfill - keep your eyes peeled for my next blog!)
- Wool Cover: a nappy cover, made of wool, which is then "lanolised" to make it water resistant, or moisture wicking. Typically used to cover a folded cloth nappy made from a Terry square or other fabric.

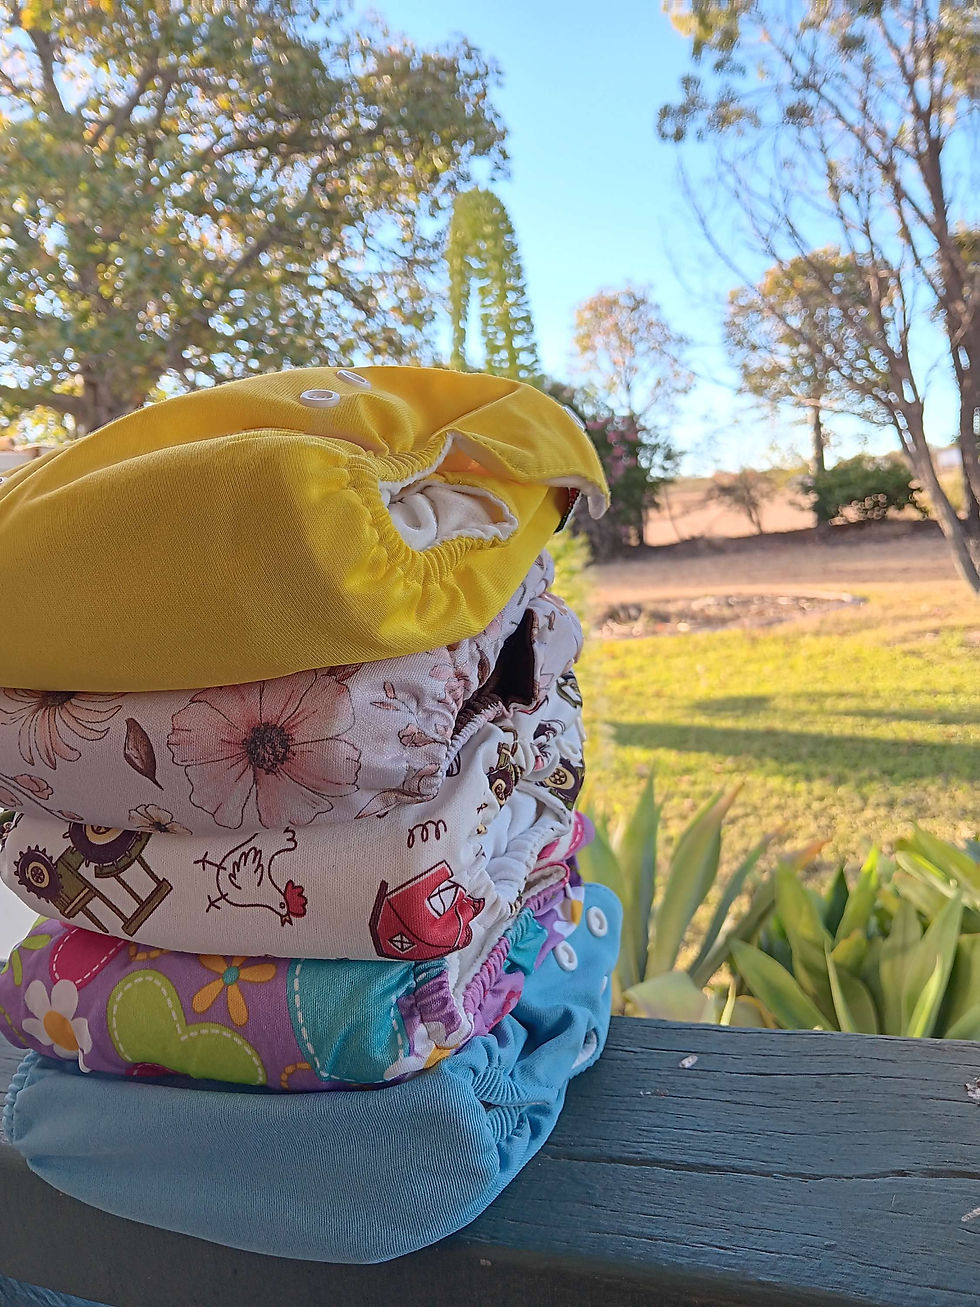
Part 2: Setting Up Your Stash
When it comes to setting up your cloth nappy stash, there are many ways to go about it, and many options to choose from. An important point is how many - most people work on about 14 nappies for part time use, and around 30 nappies for full time use. All depending on your wash routine, and other scheduling factors that will determine how many nappies you have dry and usable at any one time.
The most common type of MCN available is the pocket nappy, closely followed by other types of PUL shells like All in Ones, or shells without a pocket that the inserts "lay in" instead. Other options include a Terry square or prefold (a preshaped piece of fabric that is then folded into a cloth nappy) which then need to be covered with a waterproof layer, such as a PUL shell or a wool cover. Most of my stash consists of OSFM pocket nappies, however, I have a handful of AIOs, and have used a Terry square with a batwing or kite fold under a normal PUL shell when I have been short of inserts! The most useful design I've found is the nappy shell design that has two rows of snaps for fastening: leg snaps and waist snaps (as well as the three levels of rise snaps for size adjustment). They've been the easiest for me to consistently get a good fit, and that style with the extra row of snaps works better for the newborn hack as well!
Then it's how to source them. Of course many people feel most comfortable buying brand new for their bub, and if that's within your budget, then go for it! I've seen most people say they justify the cost of brand new cloth nappies with the savings on not needing to buy disposables for their first child - then those nappies continue to serve their family for subsequent children, making them well worth the initial investment. However, not everyone has the budget to invest in all new cloth nappies right from the get go, so let me share how I done it!
Thanks to the gurus at Clean Cloth Nappies, I felt comfortable buying second hand MCNs as I was able to confidently sanitise them using their methods prior to using them on my baby! Please check out their website for more info on sanitising second hand nappies, but just know that it is possible, and safe for your little one. I sourced most of my nappies off Marketplace - the second hand market for MCNs can be a little wild sometimes, but I managed to score close to 30 usable nappies for $4-7 each. (The $4 ones were well worn, and a few turned out to be delaminated - the $7 ones were brand new, second hand but never used.) Although it's possible to buy full stashes of 30 odd nappies from one seller for reasonable prices, I chose to do a bit more leg work and source several different smaller bundles so that I had a few different brands to work with. The main clue I picked up in my research was that almost every brand had positive reviews of nappies fitting perfectly, and negative reviews of poor fits and leaks - so I figured every baby was different, and I was best not committing to all one type of nappy without knowing what would work for my baby. And that served me well, especially as some brands worked better with the Newborn Hack, and other brands fitted better as she grew, and we're constantly readjusting the favourites in the stash as to what fits and works best at any given stage.
Another option for buying second hand is to check out Op Shops! I've picked up quite a few for only a couple dollars each; I always just keep an eye out for a good deal when I'm in an Op Shop. As purchasing nappies this way makes it impossible to communicate with the seller and find out how old the nappies are or how they've been cared for, I've also picked up a couple duds that delaminated quickly, and I've had to replace a few leg elastics to make others usable, but overall it's a very cost effective way to get started with cloth. It's also a great way to source more inserts if you find you're needing more absorbency, as most nappies come standard with one insert and you have to purchase additional inserts as needed. I found one insert served us well until around 8ish months old, then I started putting two inserts in each nappy and that's still working well for us - but my girl has never been a super heavy wetter, and we've been offering the toilet since 5.5mo, so half of her wees aren't actually going in a nappy. You may find you need more absorbancy earlier if you have a heavy wetter!
Another option for increasing absorbency in your nappies if you're struggling to source enough affordable inserts is to use a Terry square in a pad fold, slipped into the pocket of your MCNs! I find one Terry square to be equivalent to two microfibre inserts, so it's an efficient way to increase absorbency when you find you need to double up your inserts and no longer have enough for the amount of shells you have. Of course, it's helpful to purchase a pack of Terry squares as part of your baby prep anyway, as they make great burp cloths in the newborn stage, and they make awesome floor rags in the toddler stage of spill everything on the floor! I also use them as a big bib if we're out somewhere and I have bub in nice clothes, I cover her chest and lap with a Terry instead of needing bibs (we rarely use bibs at home). Add in their bonus use as cloth nappy inserts, even if you're not going to use them as a traditional cloth nappy, it's well worth purchasing a pack or two in my opinion!
Part 3: Washing
Now that you've sourced all the bits and pieces and set up your stash, you'll be wondering how to go about washing everything! As I've mentioned above, the gurus behind Clean Cloth Nappies have been my go to for washing information, so please check their content for yourself to create your own wash routine. But here's what's been working for me:
One of the most common misconceptions when it comes to cloth nappying in the modern world is the old paradigm of soaking dirty nappies in Napisan as all our mums used to do! This practice is not necessary with a good wash routine, and can actually be damaging to the PUL fabric of modern nappy shells - on top of that, soaking buckets pose a drowning risk for small children, and a manual handling risk for postpartum mothers. Additionally, Napisan is no longer formulated with chlorine bleach, only oxygen bleach, therefore its not achieving what you want it to in terms of sanitation, so you can cut that step out entirely! Instead, nappies can be "dry pailed" in an open airy basket until washing.

A effective wash routine consists of a pre wash cycle and a main wash cycle, ensuring that every nappy receives two washes. Think of the pre wash like flushing the toilet, and the main wash like cleaning the toilet - you wouldn't clean the toilet without flushing away the wee and poo first! There are some workarounds if you really find you can't do two washes for your nappies, I recommend checking out CCN for their single wash protocol. The basics of an effective wash is heat plus time plus detergent - so a long, hot wash, with enough powder is key!
My wash routine looks like:
- Prewash on a 1hr 60deg cycle with half scoop of detergent plus wash booster, daily. So every nappy, face washer, floor rag, stained clothes, or anything else that I feel needs an extra bit of a wash goes into the dirty nappy dry pail (as well as reusable breast pads, period undies, etc) which I then put through first thing in the morning when I take the night nappy off.
- Use rubber gloves to pull the inserts out of the shells before washing. Newborn breastmilk poo is water soluble so it's not strictly necessary to rinse, however I usually just gave them a quick run under the sink before popping them in the machine. After bub starts solids it gets a little trickier... all solids have to be removed before the nappy goes into a machine, and honestly, there's no real easy way to do this except for those unicorn "ploppable" poos haha! I use a silicone brush/spatula from Kmart to get the poo into the toilet, and then just pop the brush through the wash with the nappies.
- Prewashed nappies then go into a seperate dry pail (no need to dry, just pop them in straight out of the machine), where I let 2-4 days worth of pre washes accumulate until I have a full load for my main wash.

- Main wash on 40 or 60deg on Cottons cycle with 1.5scoops detergent (I use b Clean Baby). Loading your washing machine is important for the main wash, to make sure you're getting adequate agitation on all the nappies in the wash. Depending on how many clothes and other bits and pieces, as well as how well our toileting is going that week (haha), it's about 3 days of nappies to fill my machine. A full load for a front loader looks very full when you load it, but then sinks down to about 2/3 of the drum once it's all wet. If your load is compressing to 1/2 the space in your drum, you might want to add in a few clothes and things to bulk your load, or wait until the next days prewash is done.

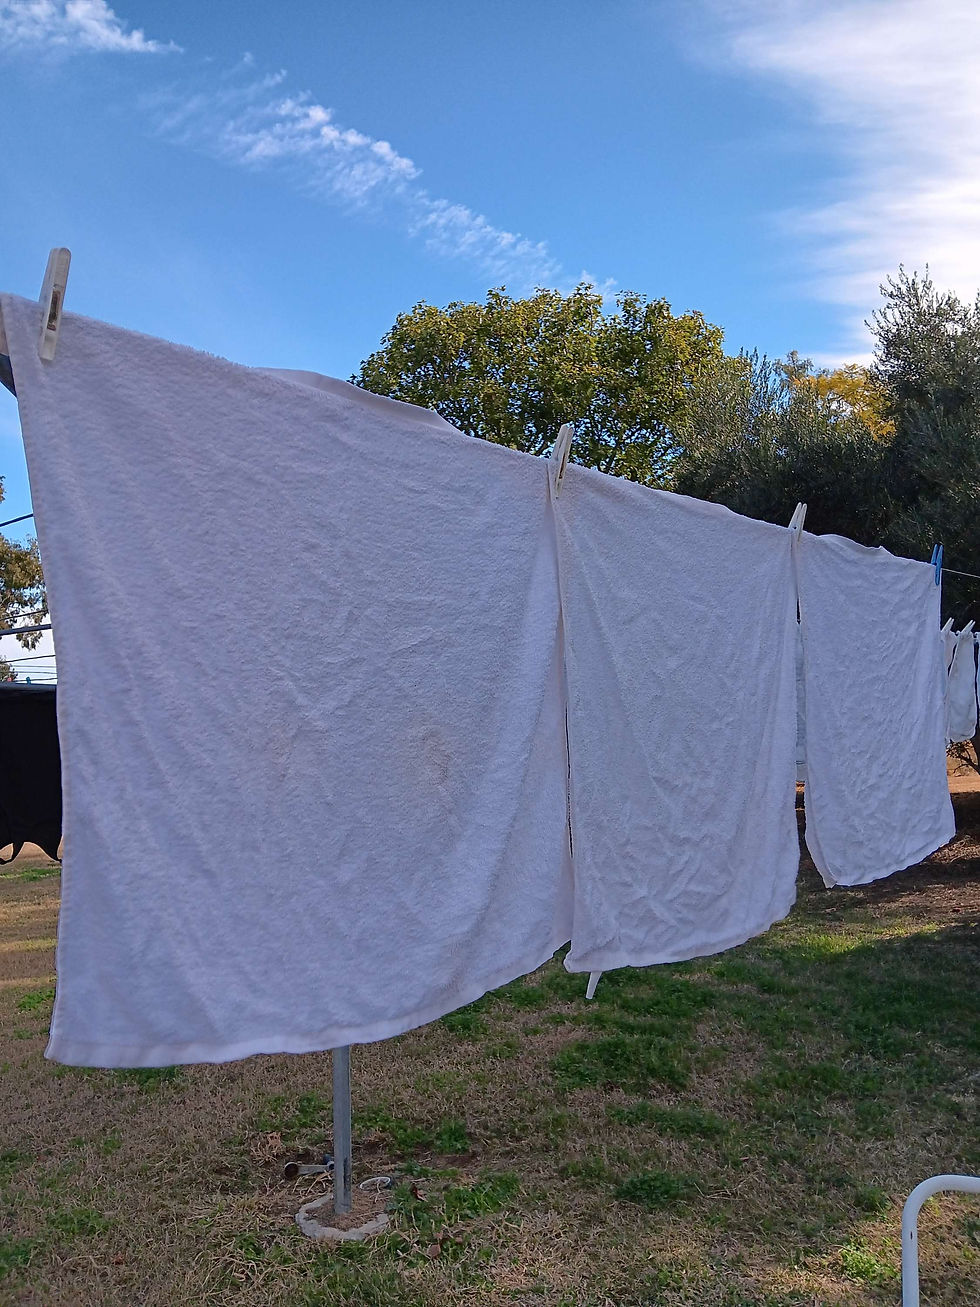
- Then I hang everything out to dry. I hang my shells on a clothes airer inside, as excessive sun exposure can also degrade the PUL fabric.

Part 4: Troubleshooting Leaks
Once again, I'm going to direct you to CCN as the experts here; the Facebook group is full of fit checks and troubleshooting leaks, so all my knowledge comes from lurking there! But here are a few things I've picked up along the way, (also keeping in mind that I'm a girl mum, and I hear some boy leaks are terribly hard to overcome so I'm maybe not the best person to ask!):
- Leaks aren't always that bad! Use a mattress protector under bub when they're sleeping; change more regularly than you would a disposable; and remember, you're already washing cloth nappies, so extra washing that becomes a result of the learning process just gets absorbed into your wash routine!
- Absorbency is key - if you're constantly getting leaks, add another insert and see if that helps!
- Tuck those leg elastics - you want to make sure the leg elastics are tucked into bubs undie line; you'll be surprised at the amount of leaks that contains, even if the leg elastics are a little loose! We have had a few poos that you would think would be disastrous with slack second hand nappy leg elastic on my baby's little chicken legs, but those securely tucked in leg elastics contained it well!
- Check for delamination - in old nappies, or nappies that have been subject to suboptimal wash routines (like soaking), delamination can occur, when the plastic lining of the nappy shell can come away, loosing their water resistance. If a nappy leaks straight through the shell at one wee, the source is probably delamination. A lot of experts will say that is the end of that nappies life, but I say different! I have come up with 3 ways to revitalise delaminated nappies and keep them in your stash and out of landfill! Keep your eyes peeled for my next blog for step by step instructions!
Part 5: Hacks
Newborn hack:
The newborn hack consists of transforming a OSFM nappy into a nappy that will fit a tiny newborn babe, to save you from buying newborn size reusable nappies that you may only need for a few weeks or months.
Step 1: adjust the rise snaps to the middle snaps so that you have one row of snaps visible.
Step 2: position the nappy on your baby, (remember to tuck those leg elastics!) and fold the top of the nappy down a little to secure excess fabric.
Step 3: secure the hip snaps on the nappy fastenings to the bottom row of rise snaps, making the leg holes as small as possible.
Step 4: snap the wings of the nappy fastenings to the last available snap, and then together over the top of the folded down top to keep everything secure.

Don't mind the grubby baby doll, she's been out playing in the dirt!
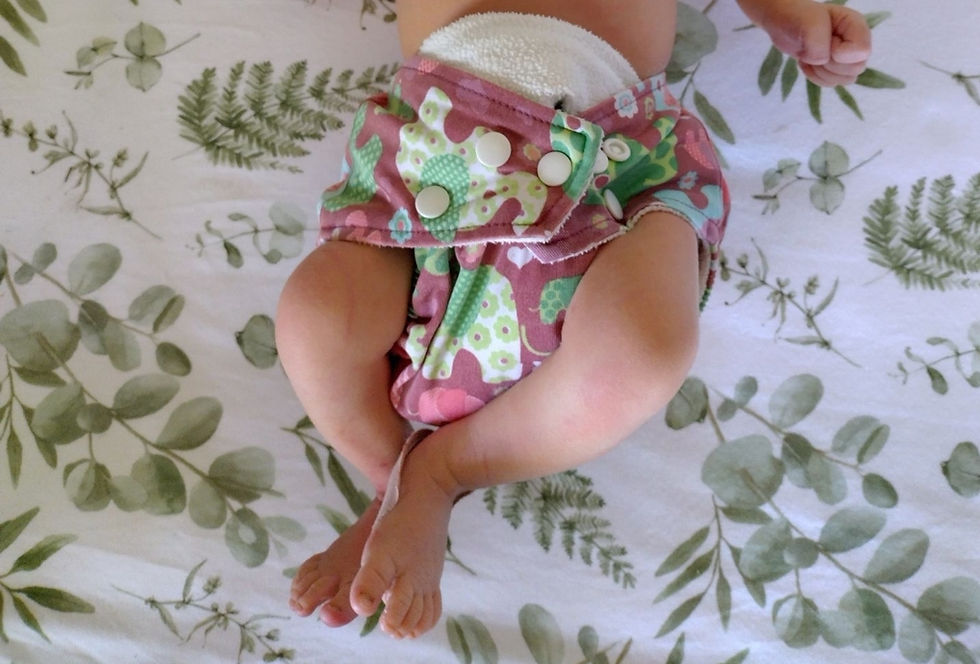
Pic for reference for the newborn hack on my actual 3 day old baby!
Cheap night nappy hack:
Specific night nappies are available on the market, however, they're pretty pricey, especially if you consider you need 3 or 4 to maintain full time cloth use between main washes! So I came up with a way to use cloth overnight, using pieces I already had on hand! Previous to this, I did cloth overnight with a normal MCN shell stuffed with 3 inserts (some brands of shells are a bit roomier, but I found 3 to be the limit of what the pocket can fit inside without compromising the shape and fit of the nappy on the baby), and this lasted us until 7-8 months old. When we needed to add a fourth insert, I came up with this system!
Step 1: take a Terry square and make a loose kite fold (according to the size of your baby), this is just to hold everything together so it doesn't need to be too flash.
Step 2: layer in your inserts (the best number is how many you need to comfortably contain the overnight wees without the outside Terry being soaked as well - the outside Terry should be no more than damp in the morning, the inserts do the heavy lifting here, so just keep adding more as needed!), you can also use Terry squares in a pad fold here. Add a stay dry layer. I use homemade liners cut from nursery fleece from Spotlight.
Step 3: secure the nappy to your baby using a snappy.
Step 4: take two MCN shells - I find this a good way to use shells that have one slack leg elastic, or if they're slightly delaminated on one side, since there is going to be two here, you can adjust to have one cover the weak spots in the other, meaning less nappies going in the bin! Snap on one shell to one side, making sure the leg elastic is secure.
Step 5: secure the other shell over the top and to the other side, ensuring that both leg holes are secure and the whole big nappy is covered by the water proof shells.
Step 6: enjoy that chunky cloth bum waddle!

Well I think that's about it for my cloth nappy expertise! Keep an eye out for my next blog which will be all about how to revive those delaminated and unusable nappies - no need to throw them away!
Let me know if you found this helpful, or if I've missed anything that you find important!


Comments